Show Mobile Navigation
How's
Showing posts with label How's. Show all posts

How to Add Classic Printer to Google Cloud Print by Chrome

Hemant Verma - 8:43 PM

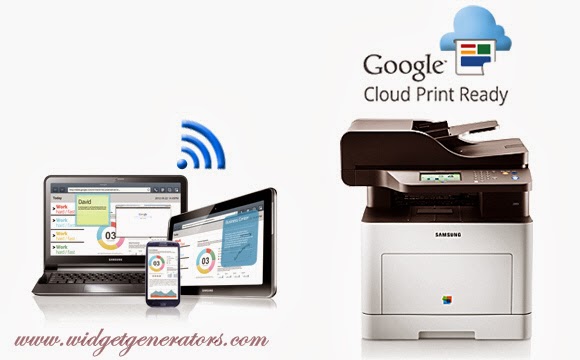
Google Cloud Print is a new technology which is developed by Google. By using this technology we can easily take print outs of our documents from anywhere. Google Cloud Print can print to either a Cloud Ready printer that can connect directly to the Internet or a classic printer that is plugged into a Windows or Mac computer with Internet access. If you are using a Chromebook and you attempt to print, you will be prompted to set up Google Cloud Print to connect a printer.


How to Add Meta Blog Description Without Use Any Code

Hemant Verma - 7:17 PM

Creating a blog is very simple in these days but make it top on the search engines is a kind of difficult job some where but with some correct meta settings we can do it very easily, so to do this job we have to write the correct meta description of the blog but it's also a some where little difficult job be'coz we always have to write it by using the codes but blogger has been given us some new way to do this job without any code, we just have to write our meta description in the blog and then have to save it and our meta description will get enable directly on the search engines.


Add Meta Description of Blog without using code

  • Login to Blogger > Dashborad
  • Click on Drop Down Menu and select Settings
  • Click on Search Preferences
  • Click on Edit of Description


Let's See Image Example


Enter Your Description (like below)


How to Add Meta Tags for Each Post V2

Hemant Verma - 1:45 PM

As we all know that Meta Tags are very important for every single website in blogger and not also fr blogger it's also very important in every kind of website, blog, software and every kind of software and other things need search description, and We could say that search description is an another name of Meta tags for websites, blogs etc. But if meta tags could be added for every individual post in blogger without any code then it can be very helpful very a kind of big achievement for bloggers, be'coz then our SEO will be more powerful in search engines. As we wrote a last post about on this topic that how to add meta tags for each post and that also working trick of it but there is one drawback of that trick is that we had to add every meta tag code for every single post and also had to save in blogger template, so this i very time consuming trick and this also increase the loading time of template. So, today we have a  new and very simple trick for this task and you don't need to add code and also not have to save your template every time. 


Read Also -  Meta Tags Pack

2. How to Add Meta Tags for Each Post V2


Lets's Go for it


  • Login to Blogger
  • Go to Dashboard
  • Create a new post
  • After written by your whole article
  • Open SEARCH DESCRIPTION (on the right side of post editor)
  • Enter your SEARCH DESCRIPTION in that box (like in image below)
  • And, finally publish your article.


This a best and perfect way of adding meta tags for every post in blogger.

How to Create a Free Guestbook

Hemant Verma - 2:29 PM


Ardguest is a simple guestbook script that uses a flatfile to store messages, so you don't need any database like MySQL or PostgreSQL. It's suitable for anyone who need a guestbook that can be setup quickly.

Features : multi-pages display, ability to delete unwanted entries, checking for required field warning messages for missing fields, mail notification when someone signed the guest book, image verification code and spam filter words. Support for both Windows and UNIX/Linux web hosting.


Create Free Guest Book

Requirements

PHP 4 or above with session support enabled and GD library (optional). For a list of PHP hosting providers which support PHP 4 and above you can check out WHS for the most reliable reviews.


How to Install

1. Open index.php with your favorite text editor and change some of the variables so that the script does what you want it to. They should be sufficiently documented in the program file.

2. Make a directory on your server where you want to put the script, eg. guestbook
 

3. Upload index.php (the guestbook script), image.php (image code generator), ardgb18.dat (guestbook data file), and spamwords.dat (spam words data file) to a directory in ASCII mode. Chmod ardgb18b.dat to 666 (Unix/Linux only), to make the data file writeable or you will get writing permission error.
 

4. Upload all icons file in binnary mode. The directory structure should be like this :

/guestbook
   |--index.php
   |--image.php
   |--ardgb18b.dat
   |--spamwords.dat
   |--/imgs
         |--del.gif
         |--email.gif
         |--homepage.gif


To use :

Link to the following to sign :
http://www.yourdomain.com/guestbook/index.php?do=add_form

and link to this to view the guestbook :
http://www.yourdomain.com/guestbook/index.php

How Your Blog Should Look in the Home Page?

Hemant Verma - 4:59 PM

As we all knows that "First Impression is the Last Impression" if any one like your blog OR it's content then that person will definitely again visit your blog, and  home page is very important in the sense of blog be'coz users always take interest in the blogging than any website be'coz blog is always written by a person's choice and users 80% get the genuine things in the blog but not on the websites. So, that why your blog should be look professional in the home page.


How Your Blog Should Look in the Home Page?

    1. Above Fold

                   As we all knows about the newspaper, newspaper comes in the fold type position (like below)
This Newspaper is in Above Folding Position

Newspaper comes in the fold type position in the morning, and that position is called as "Above Fold" (Fold from above side). We can see in the newspaper all the top most news always looks on the above page and rest their story looks on the below page, so the concept of blog should be the same, some parts of article shows on the home page and rest part will be available on the below of that article when user will click on the topic.


The first thing people do when they reach a website then is to absorb as much information as possible before they start scrolling many of your users won't even bother scrolling.They will glance at the opening windows then click away.


Above Fold in Simple Words (In Blogging Language) 
A kind of read more hack where we show short article instead complete article (like in below image)

Here you can see the 2 articles but both are not complete article


2. Advantages of Above Fold

  • User can read many topics on the home page at a same time.
  • User will take interest atleast on the 2 topics.
  • User will open that article which he/she wants to read that will increase your pageviews in Google Analysis. 
  • If 1000 users directly visit on your home page of blog and they minimum read only two articles, it means you will get 4000 pageviews in a day be'coz if 1000 peoples visit on the home page and they will open first article and then go back and then open again new article then go back, it means only home page can give you 4000 pageview.


Final Words....!

So, this is very effective way that we can use the above fold position in the blog, that can increase the daily pageviews.

How to Add Load More Posts OR Infinite Scrolling to Blogger

Hemant Verma - 4:52 PM


Technology is running with rocket's speed :) and also technology is increasing in the world of web that why we can add as much as new features in the blog be'coz blogging is so much flexible than a website. So, we can add many new and professional features in our blog and same like it "There is an another feature named as LOAD MORE POSTS. Today you will get to know that how can we add that LOAD MORE POSTS or INFINITE POSTS SCROLLING. This is very simple and very easy to install but this effect made by jQuery.


Add Load More in Blogger

  • Login to Blogger > Dashborad
  • Click on Drop Down Menu and select Template
  • Backup your Template before making any changes to your blog
  • Now Click on Edit HTML
  • Press Ctrl + F and search the code shown below.

</head>


  • Paste below code before </head>

 <b:if cond='data:blog.pageType == "index"'>
<script src='//ajax.googleapis.com/ajax/libs/jquery/1.9.1/jquery.min.js'/>
<script src='https://googledrive.com/host/0Bxsq9VDr3zyFMjNlYjhNeWlza1U' type='text/javascript'/>
<script type='text/javascript'>
jQuery.ias({
    container : '.blog-posts',
    item: '.post-outer',
    pagination: '#blog-pager',
    next: '#blog-pager-older-link a',
    loader: 'https://blogger.googleusercontent.com/img/b/R29vZ2xl/AVvXsEjC3mdGW24i0D8rsomfau6cFYCZFbkX8athT3s4fn0k25XdnfFlrJuV8775uVuTzlhkXepgUGggDLgQgxbNPvc0Jo0WpnIT71453lyXz5uebyNj_kMq01hTr57GWDqw7l1GI5-WEz_hWhEz/s1600/wgloading.gif'
});
  </script>
</b:if>

  • Finally Save Your Template.


Final Words....!

Load More Post widget simply made  by using the jQuery and this can install very easily but adding the some simple codes, but as we said this widget made by jQuery you it can affect your template some where like javascript could be affect by this jQuery codes but don't worry it will not affect your other important plugins. So go and add this.

How to Create eBooks Without Any Software | Freee

Hemant Verma - 2:48 PM

Hello frndssSSS.... from the last many times I was finding a best, simple, free way to create eBooks and I also found some tricks by which I can create eBooks (in PDF format) but they all are is not that much reliable for me and also not flexible not also free :) So, I also asked with my some frnds also asked to some online frnds but not only a single person tell me the good way to create eBooks but one day I read some about the eBook but I didn't understand that be'coz the language was very very technical so I asked about it with my one frnd Mr. Amit Dey and gave that link to him and he explained me about that particular stanza, then I got that How we can create a good eBook without any cost and without any software and then I try to do that and I created a ebook in just one step. So, I also want to share that trick with all of yous. 


Let's Get How to Create eBook in Just Two Simple Steps


Step Ist  -  Create eBook (Write Content)

  • First Open MS - Word and Write Your Whole Content in it with Images, Links, Starting Cover etc.
  • After that Save Your File With Any Name (Remember don't Change File Extension Name)


Step IInd  -  Create eBook (Convert Word Doc to PDF File)

  • Open Convert Online Free Website
  • Click on Browse Button and Select File and then Click on Convert Button (like in below image)


  • After that, A POP-UP window will come, and you have to click on Save button to Save that converted file.
  • and Save Hurry, be'coz your ebook is ready for use.


Final Words....!

We always believe to help in Peoples and to Share our knowledge with other peoples, and that is what that we try to do here from last 4 months and we got very good results from our all dear visitors. So, THANK YOU MUCH FOR YOUR LOVE. Keep Stay Tune With Us.

How to Secretly Copy Files From Someones PC Without His Knowledge

Hemant Verma - 7:58 PM


You can easily copy data from your friend's computer to with out knowing him/her. This trick can help you to do this kind of task, and you don't need any kind of internet support for this task and also don't need any kind of new technology like Bluetooth, Infrared etc. You can do this task by just a little notepad trick also need some codes for this job, and I will totally work very smoothly.

This Trick could prove to be very helpful and it would Copy and Steal all the Data without the Confirmation and Knowing of Computer Owner.


How to Set a Custom Channel Name in Youtube

Hemant Verma - 10:14 PM

Custom names are going to set in every sector of internet like custom link, custom blog link, so same as youtube also giving a small service and you can create a custom a channel name in your own youtube channel, if you create a custom channel name in youtube then your visitors can easily search your channel name, and that will be more easy for getting the more and more youtube views on your videos, but remember you can set it only once and you can't change that channel name in future and also can't repalce it with any other channel name.


Set a Custom Channel Name in Youtube

  • Open Youtube.com
  • Sign in with your google OR gmail account.
  • See below video and Follow all steps


Final Words....!

As I posted this tutorial be'coz we recently create a our youtube channel and when I want to set their custom channel name then I got many problems in this task be'coz that's some where difficult be'coz youtube didn't give direct option for setting the custom channel name, after I ask to my friend Kartik and he told me how to set that custom name, so I set that name successfully and I want to share it with my visitors and friends. So, Be Happy and Keep Blogging :)

How to Copy Paste the Coding of Command Prompt Output to Notepad

Hemant Verma - 6:49 PM

Today there is a new and simple trick which is related with the Windows and Command Prompt you can easily say that here is a simple trick that "How Can You Copy the Coding of Command Prompt OR DOS to Notepad" as we all know that we can copy anything in the DOS by COPYCON command but if we want to copy all codes OR Output codes and paste them in the Notepad. So, I think this would be some where a unique trick. Let's have give at a taste. :)


How to Transfer Your Feedburner Subscribers to AWeber

Hemant Verma - 5:48 PM


Our team always would have recommended FeedBurner as an RSS tool. FeedBurner was a free RSS tool that let you collect email addresses and automatically send subscribers emails every time you would publish a blog post.

However, FeedBurner was purchased by Google in 2006, and in late 2012, Google shut down FeedBurner’s API. It is now said that FeedBurner will soon disappear completely. Before FeedBurner is gone for good, what should you do with all of your blog subscribers?

FeedBlitz is the most equivalent service to Feedburner. However, it’s not free — you pay by number of email subscribers, and if you have over 1,000 subscribers that’s already $30 per month. 
That’s why I recommend using an Email Service Provider (ESP) called AWeber to manage all of your email marketing, including your RSS subscription emails. AWeber is $1 for the first month, and $19 per month thereafter for up to 500 subscribers
– and you can use it to manage all of your email marketing, not just your blog subscription emails. It’s used by many top bloggers today.


How to Remove Attribution from Blogger

Hemant Verma - 10:47 AM

Attribution is very common thing which is every single user of blogger wants to delete from their blog but blogger's term and condition will not allow you to delete this widget from layouts, you have to delete it by using the HTML template editor and this is very easy to do this be'coz you have to delete just one code and you can easily delete it. Attribution is right of blogger be'coz we are using free unlimited hosting service of blogger so that's why we should not remove it but this attribution is wrote in a very simple way that's why we all of us want to delete it.This widget is not necessary to delete we can show it on the bottom of page of our blog but some times when we upload a new blogger template then this widget shows at right side OR at the top of the blog so that's why that many time frustrate many bloggers and we also can't delete it without codes so that's why we want to delete it permanently.


Part- Ist   Remove Attribution Widget From Blogger

  • Login to Blogger > Dashborad
  • Click on Drop Down Menu and select Template
  • Backup your Template before making any changes to your blog
  • Now Click on Edit HTML 
  • Press Ctrl + F and search the code shown below.

<b:widget id='Attribution1' locked='true' title='' type='Attribution'/>


  • Replace above code with below code.

<b:widget id='Attribution1' locked='false' title='' type='Attribution'/>


  • Now Save your template.
  • This is Part Ist.


Part- 2nd  Remove it From Layout

  • Now Go to Layout 
  • Click on Edit of Attribution 
  • This time you can see the Remove button
  •  Click on Remove button your widget will remove easily.
  • And that's done say hurry...!


Final Words....!

After using all steps you can easily remove your attribution widget which is locked. By using the Ist part it will unlock and in 2nd part it will able to remove. I think we should not remove attribution link from blogger but as I said this looks very simple so that's why we don't want to remain it.

How to Load Fast Your New Blogger Template Editor

Hemant Verma - 9:40 AM

Hello Friends we all are enjoying the New Update of Blogger that they launched their new Template Editor which very simple and easy to use and also we can find our widgets more easily also they removed the Ticker option from new template editor but almost all peoples on blogger is facing a very common problem when they want to edit their template then it takes time in loading than the previous version of blogger. I'm also facing this problem when I want to edit some thing in my blogger template and it always give a very bad situation to my tempered. So, there is a very easy solution for it. but remember this solution is not a technical solution and permanent but this trick always works for me and also works with my friends who do blogging. Hope this will also work for you. :)


How to Unpublish Blogger Post Without Deleting OR Losing Content

Hemant Verma - 9:34 PM

Posting the article is every thing for a blogger be'coz content make us king and once if public any article in the blogger then we don't want to remove it, be'coz we all do very hard work for writing it and we don't want to delete OR remove our hard work but many times conditions not so same because of some critical issues we have to remove our post which had been published already. but suppose if you want that i just want to unpublish that article but that should be remain save in my blogger account, It means hide your content / article / post without deleting from blogger, this is very easy.


How to Add Images in Blogger Header

Hemant Verma - 2:54 PM

Many of us trying to add the images in the header of blogger but they can't add it be'coz this is very common task but if you are newbie then this might be difficult for you, We also know that this is very newbie tutorial but our regular visitor asked about this and our team suggest that it could happen that many blogger who is new they probably don't know that how to add images in the header, then we took decision to give a post about it that how to add images in header.


How to Hide Contact Form from Sidebar OR From Widgets

Hemant Verma - 2:17 PM

As we all know this, recently blogger launched their contact form and in last post you got how to customize blogger contact form but when we want to add this blogger contact form it always add on the home page and it's scripting is different than other widgets therefore we can't hide it permanently from home page and also from others pages, but by adding some CSS codes you can easily able to hide this Contact Form from whole blogger, also from home page and also from others pages.


Add Hide Contact Form from Sidebar

  • Login to Blogger > Dashborad
  • Click on Drop Down Menu and select Template
  • Backup your Template before making any changes to your blog
  • Press Ctrl + F and search the code shown below.

]]></b:skin>


  • Paste below just before it.

#ContactForm1
{
display: none ! important;
}


  • Finally Save your template.
  • Say Bingo and You are done.
 

    If Any Problem Comes, Ask in Comments


    How to Create a Great About Us Page?

    Hemant Verma - 2:40 PM

    About Us page is undoubtedly one of the most basic (and important) pages any website can publish and every one wants to have a great About Us page for their blog/website, because if anyone read your articles and your articles liked by that visitor and she/he wants to read about yourself then that page should be high class and give the feel of a professionalism and that page may increase your page views and also could increase your fan following.

    This article has 5 elements that I think should be taken into account when creating a proper About Us page. Simply pick the ones that seem to make sense in your situation, niche, design, or by whatever other standards. About Us pages that are too big don’t do their job very well either.


    Let's Make it Professional

    1. Use pictures:

    A picture is worth a thousand words. As we all know that the picture OR images always gives the different feel to article and many time a picture can say thousands of words without any single word. Pictures are great for conveying a complex message in a limited space, and also as a way to visually break up the text content. In essence, the sole presence of pictures makes everything easier to read.It's important that your page should look like a professional page that a simple and hd image can give that look to you page. So, using a picture that would be a great idea.


    2. Make it personal:

    Your page should be different than others and in other words that shuld be unique in millions than it will effect more to your visitors, that point comes in my mind because I read one line that "One interesting fact about doing business in any market is that people don’t like to do business with businesses, they like to do business with people"

    So, if your business is unique that others will think about it, it means other peoples will follow and use your ideas and that's why we always trying to use the unique blogger templates like http://www.freshersjobspot.com
    If you are not doing it then it means other way around by hiding behind your brand. 


    3.Use a custom template:

    The standard design of a blogger page is not probably the most optimal for an About Us page. This is mainly due to the sidebar. It creates unnecessary confusion, and drives people’s attention away from the main content. 
    If your theme allows it, you can simply remove the sidebar from your About Us page. If it doesn’t, you’re going to have to create a custom page template to make it possible.

    Also, try to use a bit more creative content layout than just placing one paragraph after another. Making things more asymmetric can drive more attention towards your page and actually make the whole thing easier to grasp.


    4. Corporate information:

    Displaying your physical address, phone number and other basic info is a big credibility boost. It’s also one of the simplest things you can do. It could be increase your business if you are a entrepreneur OR online business freak

    This single piece of information makes your business look more real and trustworthy. People are very careful about doing business with purely online based companies these days. There’s just too many scam artists around.


    5. Social media links:

    Nowadays, social media is an integral part of every website’s existence. If you still don’t have a profile on Twitter, or Facebook then you’re missing out on a lot of opportunities.

    By providing links to your social media profiles you’re giving your audience yet another way of connecting with you. Chances are people won’t spend hours a day on your site, but they are used to looking on Twitter or Facebook every 5 minutes. Meeting them there is therefore a great idea.

    However, I’d advise displaying the links near the bottom of your About Us page. That way you’re not driving people away from your site right away, before they even get to read what you have to say.


    If Any Problem Comes, Ask in Comments


    How Can You Get Back Your Blog's Post If Your Blog Deleted By Google

    Hemant Verma - 5:47 PM

    As we give the List of Deleted Blogs by Google deleted some blogs and we also give some links of deleted blogs and Google is suddenly deleting their blogs by giving some reasons which is related spams and violence etc. and as bloggers make their effort with them and give you the best content on the daily basis and some one is lost their 5 and 6 years of hard work and many bloggers are living from blogs by adsense and they also lost their important and valuable posts which are very important from the eye of admin and also from the visitors, and if Google OR Blogger deleted your blog and you didn't take backup of your blog's post and template then there is also a second way to take your blog's content back but this way is little sticky and you have to do hard work with it. :)


    Take Backup of Template and Posts Before Delete Your Blog

             If Google didn't delete your blog till yet then you should take backup for it, because Google is not notifying to any one before deleting their blogs.

    Take Backup of Your Template

    • Login to Blogger > Dashborad
    • Click on Drop Down Menu and select Template
    • Click on Backup/Restore button


    • Then Click on Download Full Template (like below in Image)

    • It's done and You have successfully took backup of your template.


    Take Backup of Your All Posts (First Method)

    • Login to Blogger > Dashborad
    • Click on Drop Down Menu and select Settings
    • Click on Others button
    • then Click on Export Blog 

    • then click on Download Blog.
    • It's done and you have successfully took backup of your all posts.


    Take Backup of Your All Posts (Second Method)

               First Keep it in mind that if you are using this method then it's not completely sure that you will get your all posts back but you could get back mostly 99.90% of your blog posts. 


    • Copy below link and paste in browser's address bar (where we write google.com)


    http://webcache.googleusercontent.com/search?q=cache:http://Write Your Blog URL Here / post URL


    • Now when you open your blog post then Ctrl + C and copy your all post's content
    • you can also press Ctrl + U and see the source codes of your post.


      Make Changes....!

      • Now Replace it Write Your Blog URL Here / post URL with your blog link OR Post link. 


      Note: MoreBlogTools.com has been delete by Google but by using Google's Cache Memory we can easily see their contents and posts easily.


      All the best to all bloggers, I wish that Google may not delete your Blog and If Google Already Deleted Your Then May You Get Back Your Content Back.


      If Any Problem Comes, Ask in Comments


      Next Previous
      Editor's Choice


      Make Your Blog Like a Pro
      About | Contact | Affiliates | Privacy Policy | TOS